
This DIY shape sorter will not only help your baby learn their shapes and colors, but it’s easy to make, too! All you need is a cardboard box and a few art supplies to make this super fun DIY shape sorter!
*Disclosure: This post contains affiliate links, including links to Amazon, and as an Amazon Associate, I earn from qualifying purchases. I only recommend resources, products, and services that I adore and find to be useful. If you happen to make a purchase using one of my affiliate links, I will earn a small commission, at no additional cost to you. Read more about our policies here.
Making a DIY Shape Sorter
During the beginning stages of the pandemic lockdown, I was looking for fun ways to distract myself and keep my daughter entertained. I am a bit crafty and sometimes get the itch to DIY things, and so after scrolling through Pinterest for inspiration, I came up with this upcycled cardboard box shape sorter.
Thanks to our trusty friend, Amazon Prime, we had accumulated approximately 3 zillion Amazon boxes during the dark days of COVID. So, it felt good to recycle one of them into this shape sorter. Plus, it gave my daughter a fun way to target one of her developmental milestones – learning to sort shapes and colors.
Shape Sorters and Developmental Milestones
When it comes to child development, there are certain established markers that serve as guideposts for parents so they can ensure that their kids are developing at an OK pace. These markers are called developmental milestones and there are 4 kinds, including the following:
- Social and Emotional Milestones
- Language and Communication Milestones
- Cognitive Milestones
- Physical Milestones
One particular cognitive developmental milestone has to do with sorting colors and shapes. According to the CDC, kids should begin to sort shapes and colors by about the age of 2. That is where a good shape sorter comes in handy. It gives your child exposure to various shapes and invites them to try and sort them out.
According to the CDC, kids should begin to sort shapes and colors by about the age of 2.
Check out this post full of fun learning activities for more ideas on how to target developmental milestones.
A Dual Purpose Shape Sorter
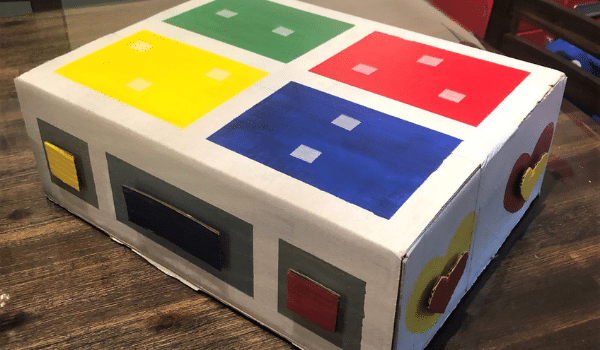
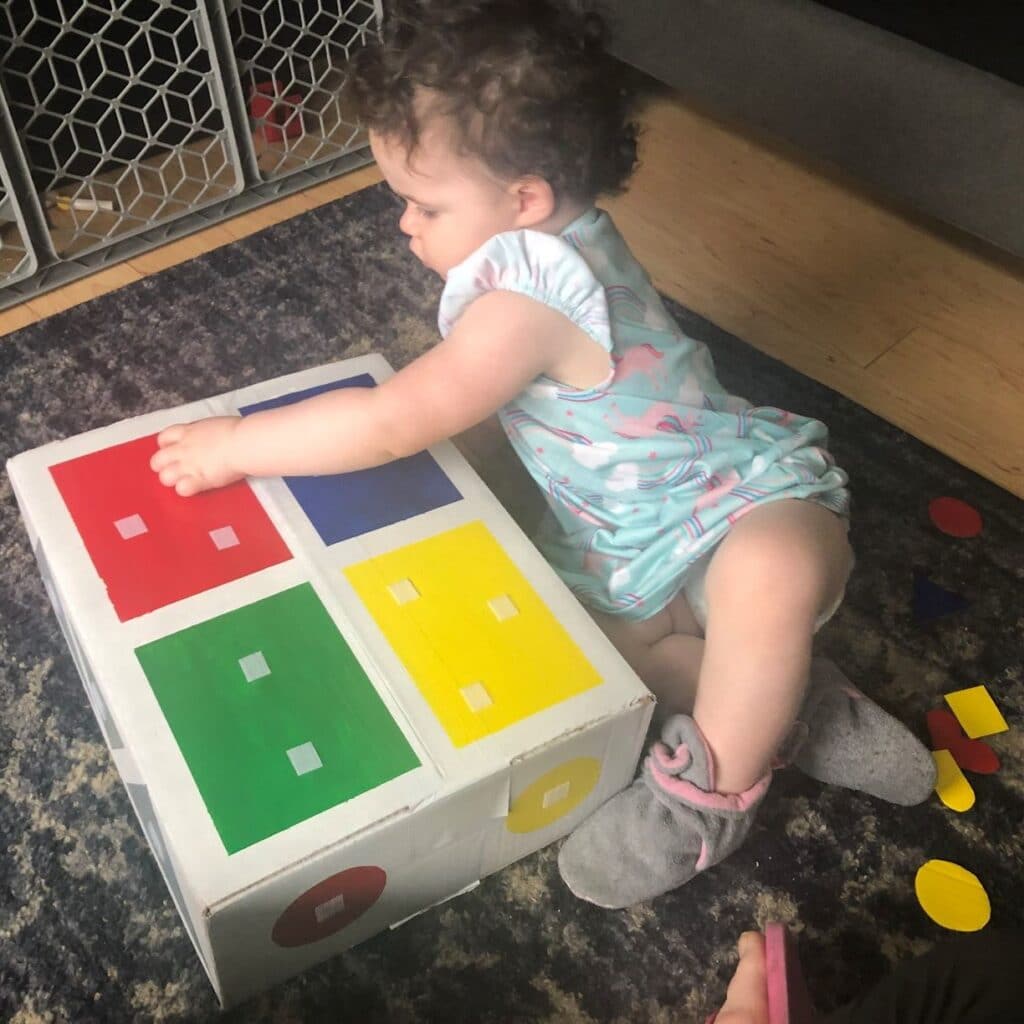
The cool thing about this shape sorter is that it’s both a shape sorter and a color sorter in one. My daughter was able to match her colors and shapes at the same time. Additionally, because there are two ways to sort, it opens up options to play different games using the sorter.
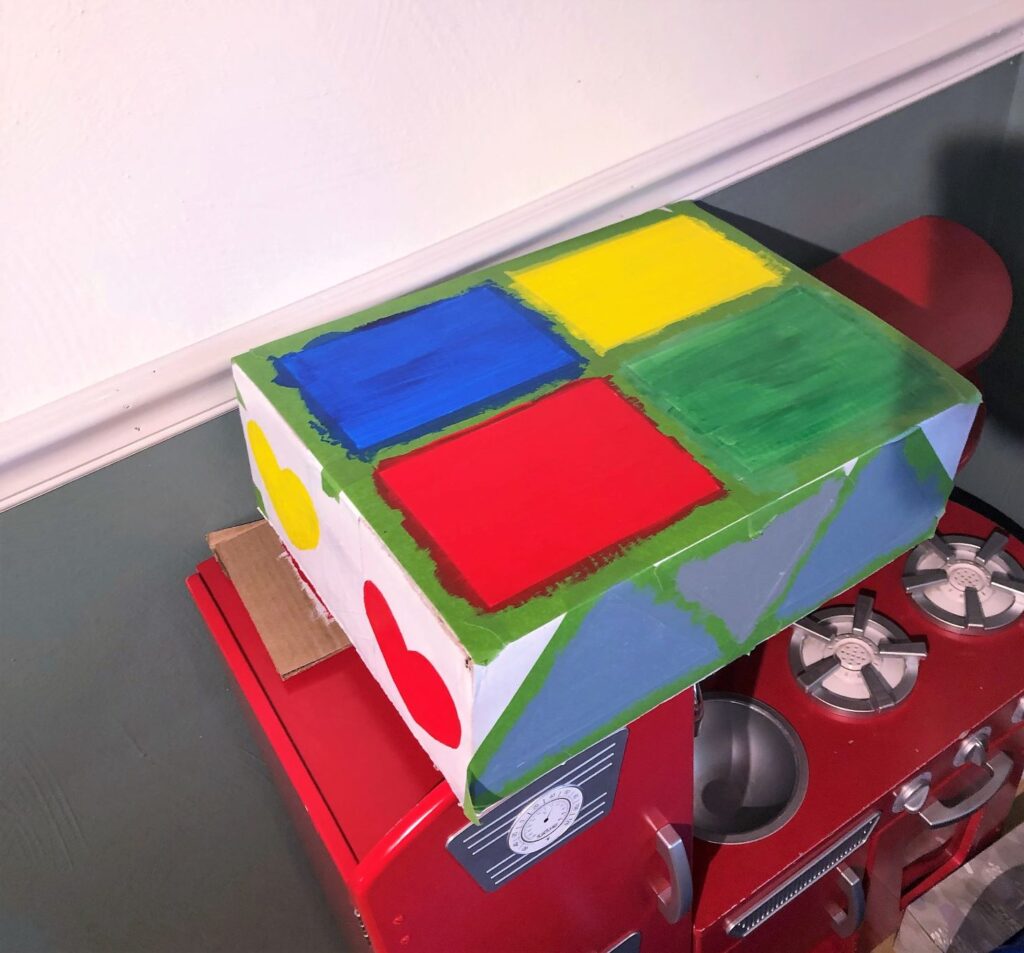
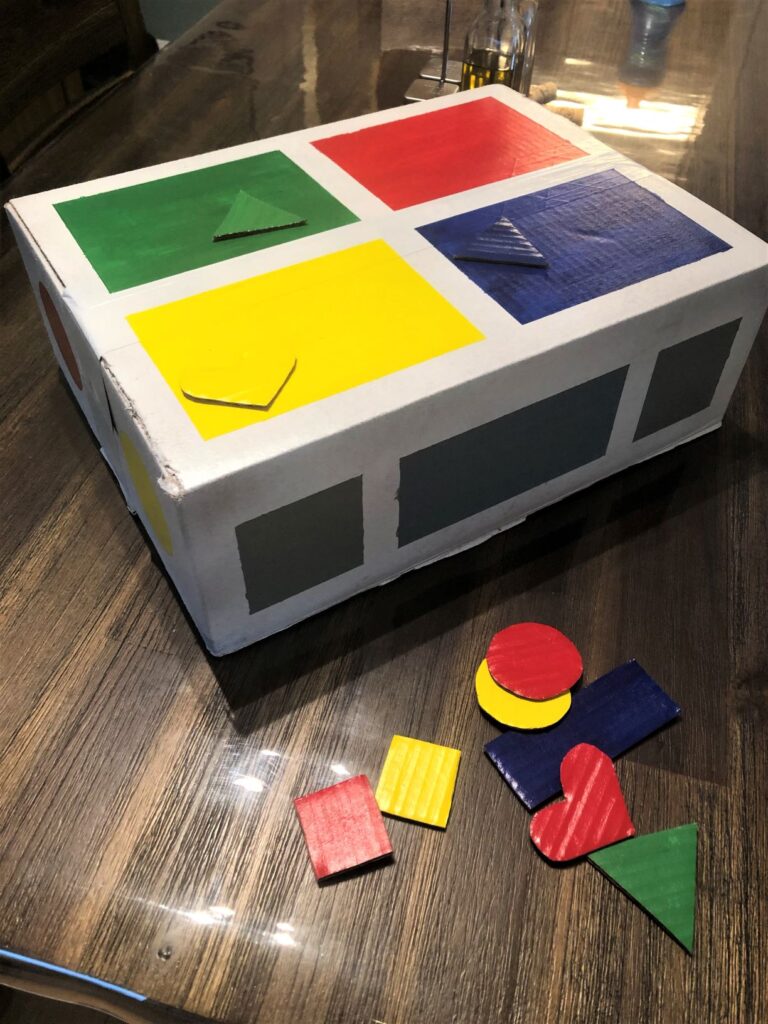
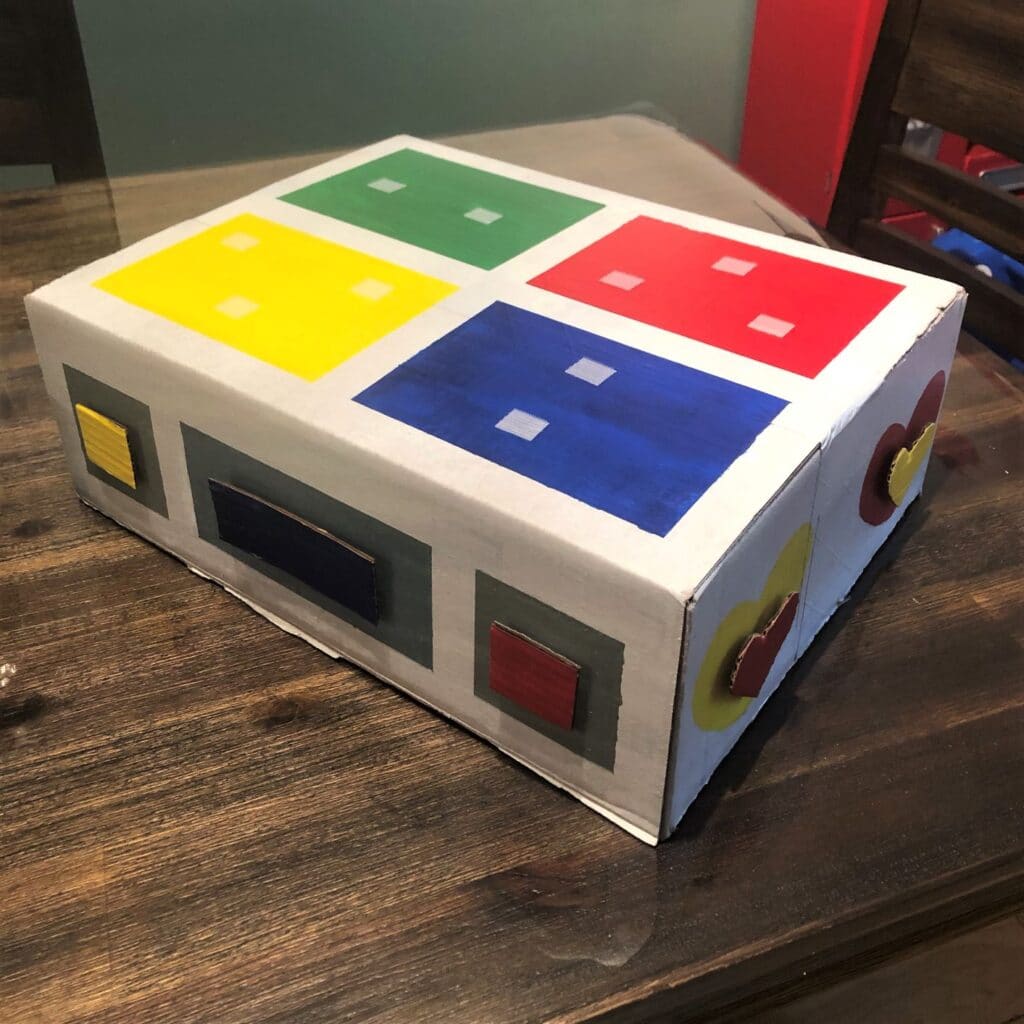
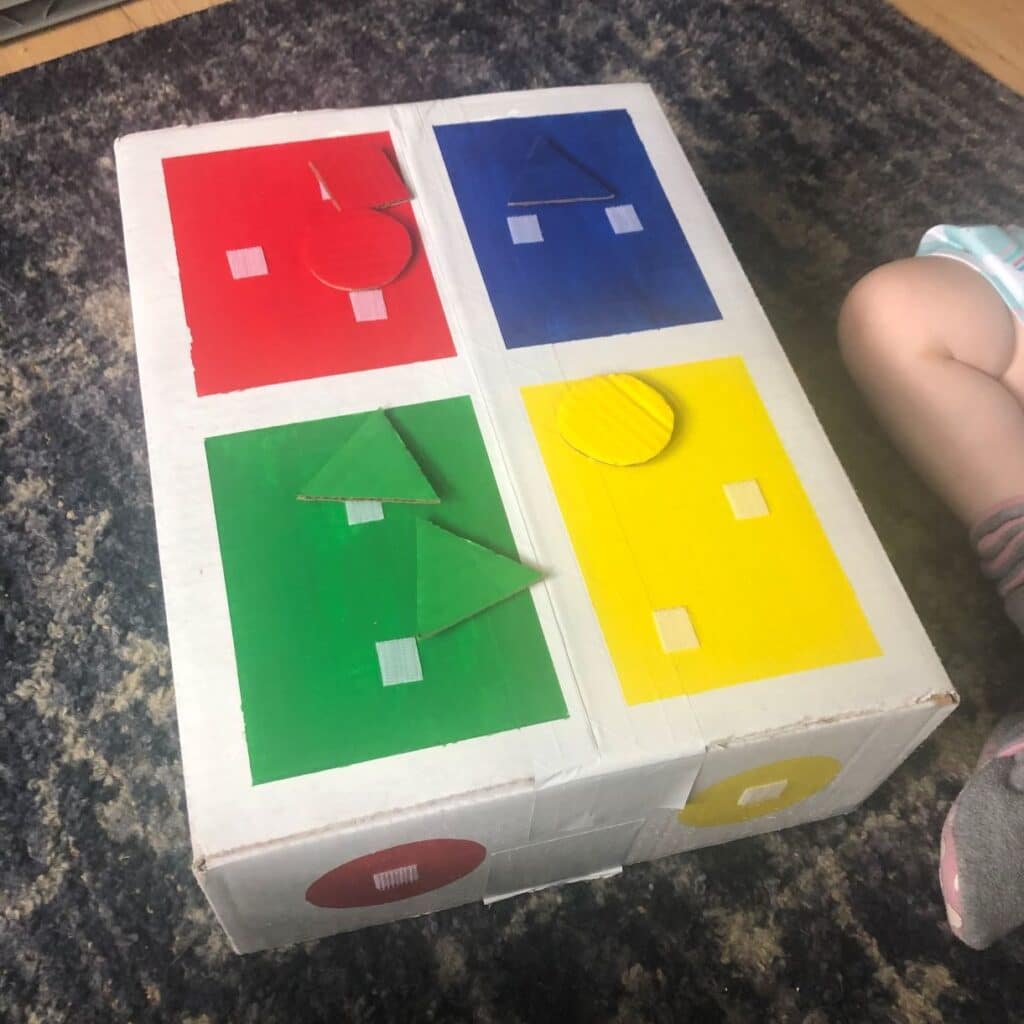
The top of the box is covered in four larger color blocks, and it’s just for color-matching. You stick each shape on the corresponding color block.
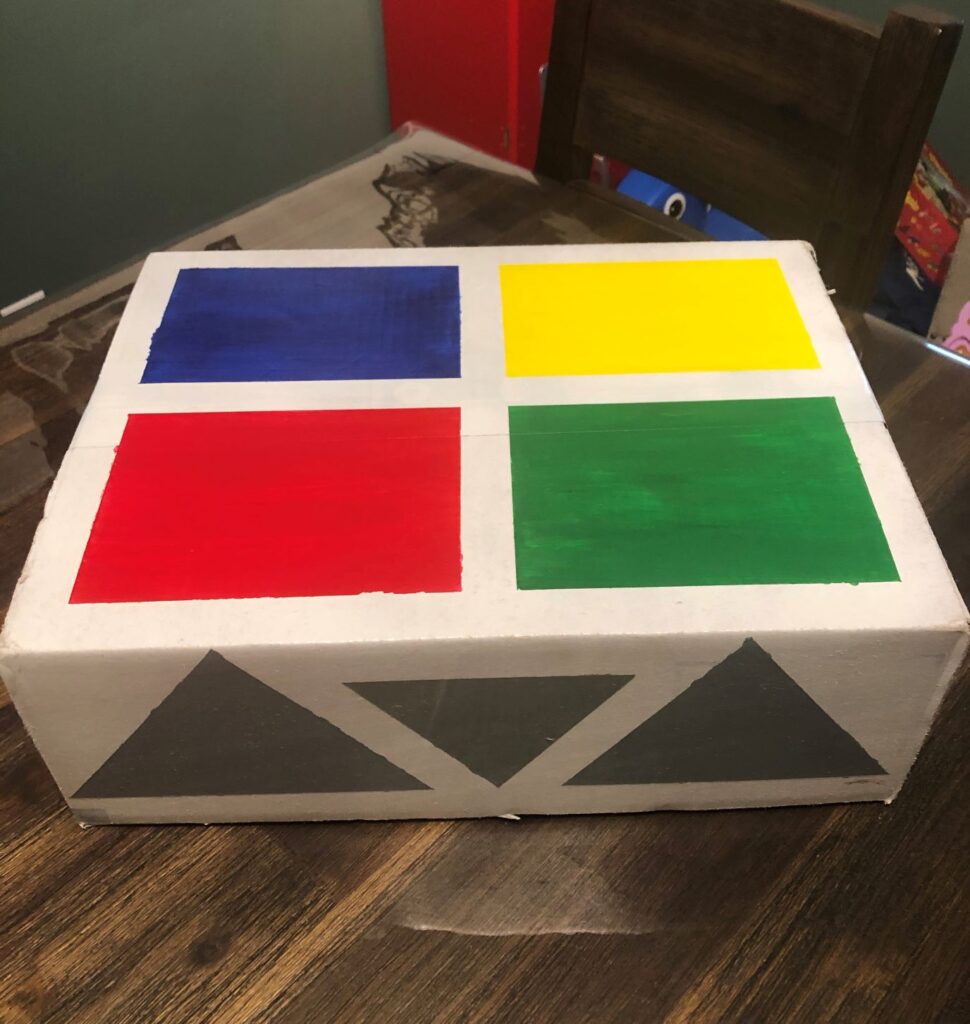
The longer sides feature gray spaces that are meant for shape matching and shape sorting. One side has a rectangle and two squares, and the other side has three triangles. You stick matching shapes onto each gray shape, regardless of the cut-out shape’s color.
The shorter sides of the box are for the hearts and circles, and they are used for both color-matching and shape-sorting.
My shape sorter also utilizes Velcro, which allows for tactile interaction with the shape shorter and its shapes. (Great for sensory play!)
How to Make Your Own Shape Sorter
This simple tutorial will help you make your own shape sorter. Check out the supplies list for suggestions on which products work best and follow the instructions below!
Shape Sorter Supplies:
| SUPPLIES | NOTES |
|---|---|
| Cardboard Box | I used an old Amazon box (medium-sized boxes are best for this project) |
| Painter’s Tape | I used a roll of FROGTAPE from this FROGTAPE multipack |
| Velcro | I used this sticky back Velcro |
| Spray Paint | I used this paint primer from Rust-oleum for its excellent coverage |
| Acrylic Paint | I used these acrylic paints from Amazon |
| Paintbrushes | I used this affordable paintbrush set (esp. the 1″ all purpose paintbrush) |
| Scissors | I used these Fiskars PowerCut Shears for cutting the cardboard shapes |
DIY Shape Sorter Instructions:
So full disclosure, I made this up as I went. But I think it turned out pretty well. You should definitely feel free to put your own spin on this, and I would love to hear how it goes in the comments below.
Would also love to see what you come up with, too! Show me your creation by sharing on Pinterest!
Go here to see my pin and then click “add photo” to share what you created.
Or post a pic on The Centered Parent Facebook page.
AND – speaking of Facebook, don’t forget to join the Centered Parenting Facebook Group! 🙂
OK, so here are the instructions for how to make shape sorter (with bonus color-matching feature):
- Choose a cardboard box to “upcycle” and cut off the flaps. (Save the flaps for later.)
I chose an old, medium-sized Amazon box, like the ones pictured below. 🙂 Cut off the flaps and set them aside. You will use those to make the small cut-out shapes that will go on the box.

- Spray paint the entire box in color of your choice.
I used this white primer spray paint from Rust-oleum because it has such good coverage. I set an spare sheet of cardboard outside on the grass and put the cardboard box on top. 3 quick coats did the trick.

- Use painter’s tape to boundary out some of the shapes.
For my shape sorter, I chose to include the following shapes:
- Squares
- Rectangles
- Triangles
- Circles
- Hearts
I used the Frogtape painter’s tape to create crisp and clean edges on the squares, rectangles, and triangles.
Creating a grid of 4 rectangles on the top of the box, I masked the borders with the tape. I also used the tape to create 3 triangles on one side of the box (see picture below in step 4).
On the other side, I used the tape to boundary out two squares and a rectangle. Jump to step 6 to see a picture of the squares and rectangle on the side.
- Paint the box and the flaps.
I chose the following colors for my shape sorter:
- Red
- Green
- Blue
- Yellow
- Gray
Painting the Shapes On the Shape Sorter Box
I went with a bright color scheme on the top of the box to create a color matching section. I chose yellow, blue, red, and green, but you can pick whatever colors you want. Just be sure they are colors your child can recognize.
The 1 inch brush worked best to paint the top section and the longer sides. I used a smaller brush to paint the circles and hearts.
I mixed black and white together to make gray, and used that to paint the triangles, squares, and rectangles on the long sides of the box.
For the circles, I used a cup to trace them in pencil onto the box and I created a cardboard heart pattern to draw the hearts. I did two circles on one shorter side, and two hearts on the other shorter side.
For each shape section, I did about two coats of paint.
When you are done, set the box aside to dry. I waited 24 hours before I removed the tape, but acrylic paint only needs about an hour to dry completely.
Painting the Cardboard Flaps for the Cut-out Shapes
After you paint the box, set is aside and grab your cardboard flaps. You will use these to create the smaller shape pieces that your little one will place onto the shape sorter. Paint each of the flaps a single color, using all of the colors that you used to paint the box. It doesn’t matter which flap is which color, you will have plenty of cardboard with which to cut out your shapes.
NOTE: I didn’t use gray on the flaps because the gray spaces were intended to be used for shape-sorting only. But you could do whatever you want in that regard.
Here is a breakdown of the color scheme I went with for the cut-out shapes (10 shapes in total):
- Yellow: 1 heart, 1 circle, 1 square
- Red: 1 heart, 1 circle, 1 square
- Green: 2 triangles
- Blue: 1 triangle, 1 rectangle
- Make sure the box is dry and then gently remove the painter’s tape.
Once the paint is dry, gently peel off all of the painter’s tape. I had a touch of bleeding here and there, but I touched it up later, no problem.
- Cut out the smaller shape pieces using the painted cardboard flaps.
In order to achieve uniformity, I made a stencil for each shape and traced the shapes onto the unpainted side of the cardboard. Using these amazing Fiskars PowerCut Shears, I cut out 2 hearts, 2 circles, 3 triangles, 1 rectangle, and 2 squares.
- Apply the Velcro to the box and to the shapes.
When using the peel and stick Velcro, you will use corresponding sides of Velcro on the cutout shapes and all of the shapes around the side of the box. AND you will need additional pieces to stick on the top of the box. The additional pieces on the top of the box should be the opposite side of Velcro to that of the cutout shapes. If that doesn’t make sense, I break down it more below.
Stick Velcro Onto the Sides of the Box
Cut out 10 small (about 1/2″) pieces of Velcro. Unpeel the backing and stick one side onto the back of a cutout shape and the other side to the corresponding shape on the side of the box. Do this for every shape all the way around the box.
Make sure you are consistent about which side of the Velcro you are putting on the cutout shapes. To simplify things, you could just use the softer side of the Velcro on the back of all of the cutout shapes and the firmer side of the Velcro on the box.
Stick Velcro Onto the Top of the Box
Next, cut 10 more 1/2″ pieces of Velcro. Before you stick the pieces on the top of the box, look at the back of the shapes. Ensure that you used the softer side of the Velcro as suggested above.
Determine how many shapes of each color you have for the color-matching blocks on the top of the box. Peel off the backing of the firmer side of the Velcro and stick them onto the color blocks. Stick on as many as you need for each color.
And that’s it!
Your shape sorter (with bonus color-matching feature) is complete!! Now go find that sweet little baby and test out your shiny new shape sorter!

Creative activities for kids, self-care tips for parents, family bonding ideas & more with the Centered Parenting Facebook Group. Join now!
Other Shape Sorters I Adore
While this shape sorter saved me money and helped the environment a little, that hasn’t stop me from using other shape sorters from the pros. 🙂 Here are my top picks for shape sorters, shape puzzles, and color sorters:
- Shape Sorters from LOVEVERY
We adore our LOVEVERY play kit subscription. Each shipment includes perfectly-curated developmental toys, tailored to our daughter’s age. Several of the play kits featured some sort of color matching or shape sorter, and our daughter loved every single one.
They have kits for every age, up to 3 years old. I honestly can’t say enough about LOVEVERY. It’s really nice knowing that we don’t have to shop for new toys and that we’re getting really good learning toys that promote development. You can get a LOVEVERY play kit subscription here.
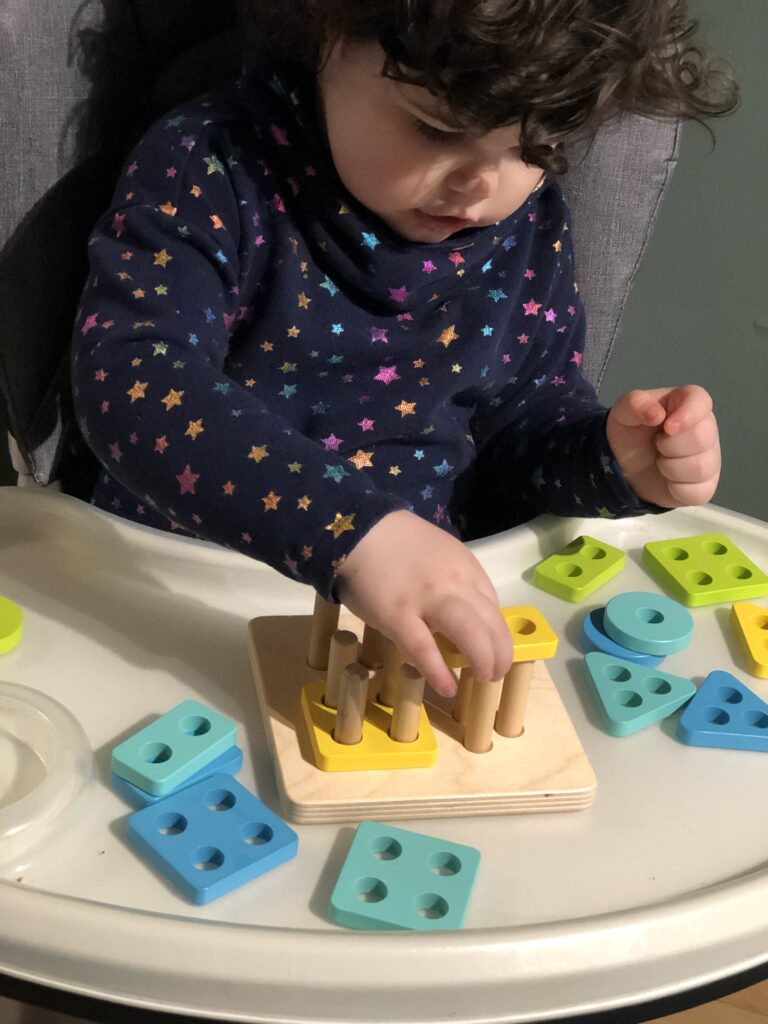
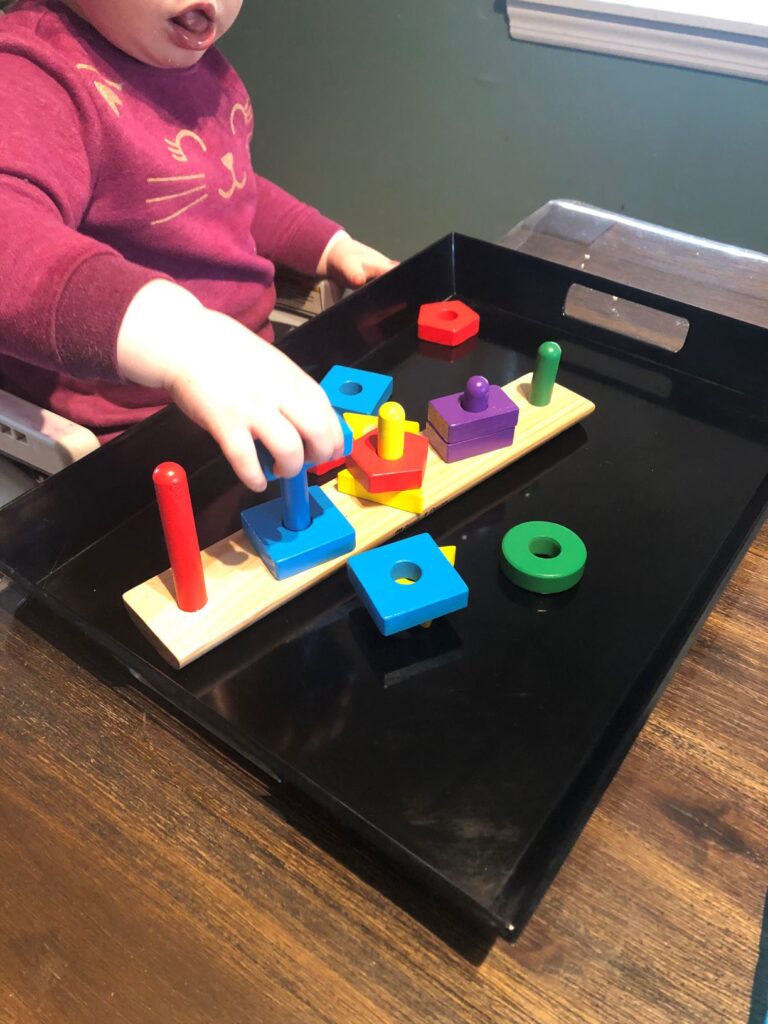
- Stack and Sort Board from Melissa and Doug
This classic wooden Stack and Sort Board from Melissa and Doug earned a place on the list thanks to it’s simple design, bold colors, and well-made pieces. This board has helped our daughter with shapes, colors, counting, and stacking. It’s just all around awesome. Get the Stack and Sort Board here from their website.
- Baby’s First Blocks from Fisher-Price
We got this block set for our daughter when she first learned to sit up. It’s got a lot of miles under its belt. From shape-sorting to block-stacking, this handy little block set gets the job done. It helped our daughter learn to identify shapes, and then when she was ready, it helped her learn to sort her shapes. It’s really affordable, too. Get the block set here on Amazon.

Thank you so much for reading! Hope your kids enjoy their brand new DIY shape sorter!! Feel free to comment below to tell me how it goes!
Want more awesome stuff from The Centered Parent? Join our mailing list below!